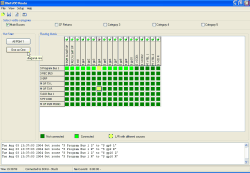
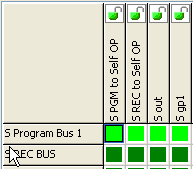
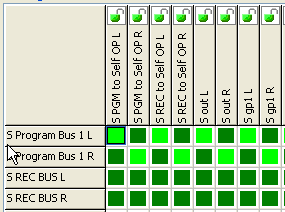
This abstract offers a compact overview over menu commands of the Routing Software. Some of the commands and their related functionalities will be described in detail in a later abstract.
Use this command to load and execute a routing script from a file. A routing script represents a current state of a router, a set of crosspoints between inputsignals and outputs. Routing scripts will be saved as textfiles in a special format with the file extension *.rms.
To save the current state of a router as a routing script, use command.
![[Important]](../pics/important.gif) | Important |
|---|---|
If you open a file with file extension*.rmsthe routing script inside will be immediately executed. You can prevent from direct execution and insert a user prompt instead, if you want. To do so, open the script editor and activate the command from the menu . (see also Menu Options) | |
You may also open scripts by using the following icon:

This command enables to save a current router state as a routing script into a file. This file is a special textfile with file extension*.rms.You may also save scripts by using the the following icon:

Use this command to refresh your routing view. The software reconnects to the DSP frame and reloads the current state.
This command is useful whenever other instances of the Routing Software on different PCs control the same routing device or if users of RM4200D control surfaces remote-control the same crosspoints.
![[Tip]](../pics/tip.gif) | Tip |
|---|---|
Normally, it is not necessary to use the Refresh command. Every switching of a crosspoint forces a direct answer in an RM4200D, which is transferred via TCP to all connected DHD applications. Normalerweise ist es nicht nötig, dass Sie diesen Befehl benutzen. As a result, the Routing Software refreshes the routing view. Under certain conditions, it may happen that the display reacts delayed. In that case you may force a manual refresh by using the Refresh command. | |
This command switches between two different modes of displaying crosspoints: Single view means, that all crosspoints are shown channel by channel (left, right, mono), which means, that a stereo crosspoint is represented by a joint for the left and a joint for the right channel. If the Single View is not activated, stereo signals as well as mono signal are represented by a single joint. An activated Single View is indicated by a checkbox in front of the menu command.
![[Important]](../pics/important.gif) | Important |
|---|---|
Please note, that viewing a routing state in the Single View mode may increase the size of the routing matrix or the routing table enormously, because a lot more crosspoints need to be displayed. | |
Use this command together with the Routing Matrix command to switch the presentation of active crosspoints. The command lists current couplings in a table. Inputs will be shown in the left column, outputs are listed in the right column. To set or release connections between inputs and outputs, you need to select the corresponding entries in the table and click on the available buttons. More detailed information can be found in a later abstract of this documentation. (see Working with the list view)
This command activate the viewing of the routing state as a matrix. Available input signals will be listed in the first column of the matrix from top to down, configured outputs are arranged horizontally from left to right in the first line. To set or release crosspoints between inputs and outputs, you need to doubleclick the related joints. More detailed information can be found in a later abstract of this documentation. (see Working with the matrix view)
Use this comand to switch on or off the Hot Start Buttons column in the left part of the application window. You may define up to 14 buttons, with each of them assigned to a routing script. Once you click onto a Hot Start Button, the assigned script will be executed immediately and the internally described routing state will be set.

![[Tip]](../pics/tip.gif) | Tip |
|---|---|
If you place the mouse cursor over a Hot Start Button for a second, a tooltip will indicate the assigned routing script file. | |
If you right-click in the Hot Start area, a context menu appears. In this menu you may call the configuration dialog for the Hot Start Buttons (command ) or switch of the Hot Start view (command ). Additional information can be found in a later abstract of this documentation. (see Using Hot Start Buttons)
This command opens a new window with an editor for routing scripts. This editor allows to edit, check and execute routing scripts. Further information can be found in a later abstract. (see Using the Script Editor)
![[Important]](../pics/important.gif) | Important |
|---|---|
Routing scripts are text files with a special syntax. You should always edit such scripts using the Script Editor. Do not use a usual text editor. The Script Editor suppresses particular information, which are necessary for its function, but should not be changed manually. A usual text editor will display this additional information and it may be changed. If you enter erroneous text and save a faulty script, running it may end up in malfunction. Therefore you should always use the Script Editor to edit routing scripts. | |
You can also activate the Script Editor by clicking on this icon:

In this menu you will find all commands to configure the routing software. As the amount of possible functions behind these commands is quiet extensive, their description will follow in a separate chapter. (See “Setup Menu - Software Configuration” on page 48.).
This command will open an information dialogue. Therein you can find information about version and creation date of your copy of the Routing Software.
![[Tip]](../pics/tip.gif) | Tip |
|---|---|
Write down these information before contacting your DHD dealer! | |

