You can program use scripts for programming internal RM4200D processes. They enable you to do certain things that otherwise would be quite complicated to realize with only the default means of the DHD software. Scripts are for instance used in the Toolbox4 software for controlling complex operations in the system at the push of a button. You can use scripts in the Routing Software in order to send a number of routing commands to the RM4200D router, which will be instantly implemented.
When working with the Routing Software, you can use scripts without having to enter script commands yourself: As soon as you select the Save Script command from the File menu, the current state of the router is stored in a script file. This "snapshot" consists of a sequence of routing commands, which will put the router in exactly the state that you have saved.
You can go on processing a thus generated script with the aid of the script editor, or you can directly link it to a hot-start button. On hitting the button, the commands stored in the script are sent to the RM4200D system. (see also Using Hot Start Buttons)
![[Note]](../pics/note.gif) | Note |
|---|---|
For many applications it is sufficient to save a once set router state as script, and to later retrieve it with a hot-start button. If you would like to progress with the scripts subject, please carefully read the following paragraphs and also note the information in other parts of this manual! | |
Scripts are regular text files, which are stored with the suffix *.rms.
![[Important]](../pics/important.gif) | Important |
|---|---|
In principle you can use script files with a standard text editor. However, we recommend not doing so but instead using the script editor of the Routing Software, for the following reason: The script files contain special control commands which are hidden by DHD applications but are visible in the text file. If you accidentally alter or delete these control commands with a text editor, the script might not be correctly processed anymore. Therefore, always use the script editor of the Routing Software for editing scripts! | |
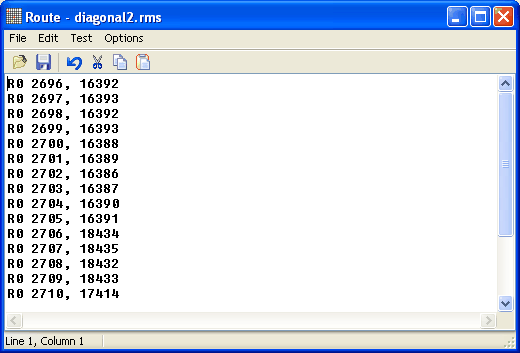
A script file consists of several lines; each of them contains a command, which sets a crosspoint. Example for the contents of this file type:
RO 2690, 16384
RO 2690, 16385
RO 896, 17152
RO 897, 17153
RO 898, 17152
RO 899, 17153
The RO character string indicates a routing command. The first figure is the addressed output channel; the second figure is the signal source, which is to be routed to this channel. If the second figure is "0", the output is muted. Each audio signal in an RM4200D has such an assigned number, which represents an address. Please read in the next paragraph about how to determine these addresses, and how to use the values in scripts.
| Note |
|---|---|
In the first Routing Software versions, signal addresses were stored in decimal format. The Toolbox4 software, however, uses the hexadecimal format for the same addresses. Furthermore, control commands on the CAN bus are also used in hexadecimal form. For this reason, current Routing Software versions can also handle hexadecimal addresses. If you want to use these, mark the address with the prefix 0x! | |
All audio signals in an RM4200D system are addressed via a special address, which is unambiguous for each signal. All physically existing inputs and outputs, as well as all internal signals on the audio bus (program busses, aux busses, output functions etc.) have an unambiguous address respectively.
You can determine the address of a physically existing input or output from its position in the DSP Frame. You first have to determine these data in order to compose the address in a second step.
The address of an input or an output consists of:
The number of the slot, in which the card with the input or output is located.
The number of the port, which belongs to the input or output.
The number of the channel in the port, to which signal is assigned.
Here is an example for a better illustration: For instance, you would like to determine the address of a certain audio signal. For this, you best use the Toolbox4 software and load the project file of the DSP Frame. Now please mark the desired Device in the Device tree and select the node. The assignment of the inputs and outputs of the DSP Frame is displayed. Look for the desired output and write down the value shown in the column, e.g. 3.2.01-02.This address reveals the following facts:
The card with the output is located in Slot 3 - this is the first cipher, the slot number.
On the card, the output is in port 2 - this is the second cipher, the port number.
The first channel bears the channel number 01 - in this case, this is the left channel. Correspondingly, the right channel bears the channel number 02.
| Note |
|---|---|
Stereo channels are not treated especially, but as two separate channels, which however respond to one address.There, the left channel has the lower number. Regarding ports with MADI channels, 56 or 64 channels are also counted separately. | |
The following figure clarifies how the different addresses are determined:

The output address is formed from slot number and port number. The slot number is the slot in which the according card is located in the DSP Frame. The port number, however, is the consecutive number of the channel in the respective slot.
Please watch for the following particularities:
If an output is concerned, you have to add the value 0x80 to the port number. Please also note, that the port numbering starts at 0, not at 1! So the following port numbers may result for e.g. a card without MADI port:
| I/O Address | Port ID Input | Port ID Output |
|---|---|---|
| Slot x.1.01 | 0x00 | 0x80 |
| Slot x.1.02 | 0x01 | 0x81 |
| Slot x.2.01 | 0x02 | 0x82 |
| Slot x.2.02 | 0x03 | 0x83 |
| Slot x.3.01 | 0x04 | 0x84 |
| Slot x.3.02 | 0x05 | 0x85 |
| Slot x.4.01 | 0x06 | 0x86 |
| Slot x.4.02 | 0x07 | 0x87 |
Not all cards dispose of eight inputs or eight outputs. MADI cards for instance can transport up to 64 signals per port. Please note that always those channels are numbered, which actually physically exist.
The slot number is identical with the number of the slot in which the card is located. Please note here, that the numbering starts at 1 and not at 0! So the following possible numbers result for the slots:
| Slot number | Backplane 1 | Backplane 2 | Backplane 3 |
|---|---|---|---|
| 1 | 0x01 | 0x0B | 0x15 |
| 2 | 0x02 | 0x0C | 0x16 |
| 3 | 0x03 | 0x0D | 0x17 |
| 4 | 0x04 | 0x0E | 0x18 |
| 5 | 0x05 | 0x0F | 0x19 |
| 6 | 0x06 | 0x10 | 0x1A |
| 7 | 0x07 | 0x11 | 0x1B |
| 8 | 0x08 | 0x12 | 0x1C |
| 9 | Slot for a DSP controller, no inputs/outputs available! | ||
| 10 | 0x0A | 0x14 | 0x1E |
In order to now determine the output address, you have to combine slot number and port number. So, the routing addresses 0x0382 (left channel or 01) and 0x0383 (right channel or 02) result from the output address 3.2.01-02 (example). These figures in decimal format (898 and 898) accord to the addresses that were used in the routing script (see above).
You can use the same procedure to determine the addresses of physical inputs, except that the additional value 0x80 is omitted. So you can route physically existing inputs directly to outputs, i.e. use the classical way to realize router functions.
One more example:
Sources 17152 and 17153 be assigned to outputs 398 and 399. This corresponds to hexadecimal values 0x4300 and 0x4301. Neither of the values can be assigned to physically existing inputs with the described methods, so they are signals on the TDM bus.
![[Tip]](../pics/tip.gif) | Tip |
|---|---|
The largest possible address for a physically existing input signal is 0x1EFF; this corresponds to the highest channel of a MADI port in Slot 30. If, in a routing script, you encounter an address as source, which is higher than this value, it is a signal on the TDM bus and not a physical input signal! | |
Part of the Toolbox4 software is a command, with which you can easily determine addresses of audio signals. This includes also signals on the TDM bus (busses, Aux signals, output functions etc.). Use the command in the Toolbox4 software to export the signal list in CSV format as comma-separated list in a file. You can view this list with any text editor. However, it is much more comfortable to load the file in a spreadsheet (e.g. Microsoft Excel).
In this list you can find not only the arrangement/order of the cards in the DSP Frame, but also the configured fader channels and the addresses of the audio signals on the TDM bus. The following chart shows an excerpt from this kind of list:
| Name | ID (hex) | ID (decimal) |
|---|---|---|
| PFL L | 0x6000 | 24576 |
| PFL R | 0x6001 | 24577 |
| Program Bus 1 L | 0x6002 | 24578 |
| Program Bus 1R | 0x6003 | 24579 |
| REC Bus L | 0x6004 | 24580 |
| REC Bus R | 0x6005 | 24581 |
| OF TX L | 0x4300 | 17152 |
| OF TX R | 0x4301 | 17153 |
| OF 027 SPK | 0x4302 | 17154 |
| OF Amp MIC | 0x4303 | 17155 |
| OF MON L | 0x4304 | 17156 |
| OF MON R | 0x4305 | 17157 |
| OF SPK L | 0x4306 | 17158 |
| OF SPK R | 0x4307 | 17159 |
This chart clarifies that output functions TX L and TX R are assigned to outputs 398 and 399.
| Note |
|---|---|
According to this method you could also trace back the addresses 16384 (0x4000) and 16385 (0x4001) from the first example to TDM bus signals. There you need to note that, in the CSV file, stereo sources are added a value of 8192(0x2000) to their actual address. However, this does not play a role for the routing, and so it is disregarded. | |
If you should not be able to find the signals with the IDs 16384 and 16385 in the CSV file, you have to add 8192 for determining the correct IDs. For our example this would result in values 24576 and 24577. These point to stereo source PFL L and PFL R.
The script editor is an separate application within the Route software, with which you can edit routing scripts. Open this dialogue by selecting the Script Editor command from the View menu. Alternatively you can click on the following icon in the tool bar:

A new window opens up, in which you can edit scripts. The window disposes of an own menu bar, which contains the commands for the editing.
| Important |
|---|---|
In principle you can use script files with a standard text editor. However, we recommend not doing so but instead using the script editor, for the following reason: The script files contain special control commands which are hidden by the Route software but are visible in the text file. If you accidentally alter or delete these control commands with a text editor, the result of a processed script might be faulty. Therefore, always use the script editor for editing scripts! | |
The following paragraphs/chapters describe the individual commands of the script editor in detail.
With this command you can generate a new, empty document in the script editor, in which you can enter commands/ for entering commands.
Use this command to open a script file. The dialogue for file selection is displayed; only RM4200D routing script files are shown. The files bear the ending *.rms .Alternatively you can open the file dialogue by hitting the following icon:

With this command you can save the currently open script file. If you have started with a new file, you will be asked for a filename. A file dialogue opens in which you can enter name and location for the new file. If a file already exists, the existing file will be overwritten.
You can also call the command by hitting the following icon:

With this command you can save the currently open script as a file with another name. A file dialogue opens in which you can enter name and location for the new file. If a file with the same name already exists, you have to confirm the overwriting.
After saving, you progress in the script editor with the new file.
With this command you can undo the last editing step in the editor. If you use the command again, the undone step is restored. This means that the undo function is only single staged!
You can also call this command by clicking the following icon:

This command cuts the highlighted part of the document and stores it in the Windows clipboard.
You can also call this command by clicking the following icon:

This command copies the highlighted part of the document and stores it in the Windows clipboard.
You can also call this command by clicking the following icon:

This command pastes the contents of the clipboard into the current document at the position of the cursor. If you already have highlighted a part of the document, this part is replaced by the contents of the clipboard. The command only works if the clipboard contains valid texts.
You can also call this command by clicking the following icon:

This command pastes/inserts a comment for each routing command, which explains the switching process. For this, the software analyses the command, inserts a semicolon, and then describes the switching process in clear text. The representation format is audio source -> signal output. The names for the signals are taken from the settings in the I/O Setup dialogue. If you like, you can change these names with the Rename I/Os command from the menu. Dieser Befehl fügt für jedes Routingkommando einen Kommentar ein, der den Schaltvorgang beschreibt. Dazu wertet die Software den Befehl aus, fügt ein Semikolon an und beschreibt danach im Klartext den Schaltvorgang. Die Darstellung folgt dem Format Audioquelle -> Signalausgang. Die Bezeichnungen für die Signale werden den Einstellungen aus dem Dialog I/O Setup entnommen. Wenn Sie möchten, können Sie diese Bezeichnungen mit dem Befehl Rename I/Os aus dem Menü ändern. (see Rename I/Os - Renaming Signals)
| Note |
|---|---|
Once that you have called the command Comment Routing Commands, you can only delete automatically generated comments by hand afterwards. Even if you change routing commands, the comments are not refreshed automatically. Instead you have to carry out the command again. Please read more about comments further on in this manual. (see Tips and Tricks for Scripts) | |
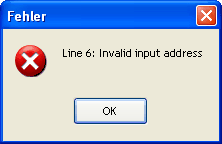
With this command you can check if the syntax of the current script is correct. The software reads in all command lines and checks if they accord to the defined script rules. Upon appearance of an error, a dialogue with details is displayed, and the test is discontinued. Please, in this case, correct the error and re-start the syntax check.
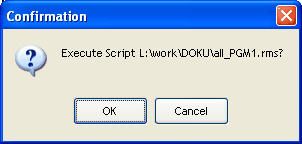
This command carries out the script, which is loaded in the editor. The commands are sent to the RM4200D Device with which the Route software is currently connected.
| Tip |
|---|---|
The currently connected Device is shown in the main window of the Route software. You will find the information at the lower rim of the screen in the status bar. | |
If you use this command, an authentication mechanism for the entire script is activated: On starting the script, a dialogue appears in which you have to re-confirm the action. If you do not, the script is not carried out. For deactivating this mode, call the command again. If the according command is marked the authentication query is activated, otherwise it is not.
If you use this command, an authentication mechanism for every single line is activated. For every single switching process a dialogue appears in which you can confirm or skip the action. Afterwards the next line is processed, again with an authentication query. In order to deactivate this mode, please call the command again. If the according command is marked the query is activated, otherwise it is not.
Routing scripts normally consist of a list of commands for crosspoints. However, you can use additional functions in scripts, if you manually insert certain commands. This paragraph describes the available options and contains hints and tips that will help you in working with scripts.
You can insert comments into a script for more clarity and for documentation of its function. Comments start with a semicolon; all characters to the right are ignored by the Route software. So comments can stand as individual line as well as be inserted after routing commands:
;comment line, not analyzed
RO 898, 17152
RO 899, 17153; comment after command
Here you find an example how to make scripts more legible with comments:
;switch PGM to on-air output
RO 768, 24578
RO 769, 24579
;
One of the subjects in the last paragraph was including authentication mechanisms into scripts if required. (see Menu Options) If you activate these options, control commands are inserted at the beginning of the script. However, the script editor does not show these commands. If you view the script with a text editor, you can find the following values:
| Option | Value |
|---|---|
| Script execution requires confirmation | ASKONCE |
| Each line requires confirmation | ASKALL |
If you need more than the two authentication mechanism options from the Options menu, you can also integrate individual queries into your script. These queries can stand at any position in the script, and are valid for a number of routing commands.
| Tip |
|---|---|
Use individual authentication mechanisms for instance on switching of particularly important crosspoints like on-air signals or return signals to codecs. | |
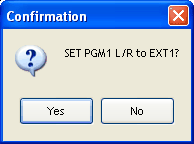
Example for an individual query:
ASK: SET PGM1 L/R to EXT1?
RO 1408, 16386;
RO 1409, 16387;
ASKEND
Enter the command "ASK" before the first relevant crosspoint command, followed by a colon. After the colon you can enter a character string, which is displayed in the authentication query. In the example, it is the text “SET PGM1 L/R to EXT1?”. The following lines contain the routing commands that are to be protected by the query. The protected section ends with the command “ASKEND”. As soon as the processing of the script comes to the line with the command “ASK”, the authentication query is displayed. If you answer with “Yes”, the script runs on as expected. If you do not confirm the mechanism, all commands until “ASKEND” are skipped.
From scripts, you can also send CAN bus commands directly to the connected RM4200D. So you can directly activate many Device functions. CAN bus functions are special control codes, which in scripts are started/initiated with the letter “C”. Read in chapter “Controlling Special Functions Via Scripts” in part 3 of this manual, “Toolbox4 - Configuration and Reference”, about further syntax and formatting of the different CAN bus commands.
| Important |
|---|---|
CAN bus commands are very flexible and powerful; however, you can impair the function of the RM4200D with wrong commands or typing errors. Therefore, please do carefully read the documentation of the used commands. Ensure that you use the right commands and that those have exactly the desired function. In case of questions please contact you DHD dealer. | |
Two examples for sending CAN bus commands from scripts:
In the first example, the active PFL switching is to reset before the crosspoints are switched. You can find the according command, 11160000,0, in part 3 of the manual.
For sending the command from a script, please insert an extra line with the command C11160000,0 in the script before the routing commands.
The second example is about switching the monitors to program bus 1 after setting all crosspoints, but only upon prior confirmation by the user.
You can find the according CAN bus command in part 3 of this manual: 11000000,6,40,02,01,00,40,03.
For implementing the function, please insert the following lines at the end of the script:
ASK: Set Monitor to PGM1?
C11000000,6,40,02,01,00,40,03
ASKEND
The Route software internally stores the crosspoint IDs in decimal format. With older software versions, you also had to use this decimal addressing in all routing scripts. This was especially error-prone because of the Toolbox4 software's hexadecimal signal addressing. For this reason, DHD advanced the Route software for you now to be able to indicate signal IDs in decimal as well as in hexadecimal format.
As described before, you can export a file in CSV format, which contains all signals with hexadecimal IDs, from the Toolbox4 software. (see Addressing of Audio Signals)
From these information, you can determine input and output addresses with the aid of the charts for Slot ID and Port ID.
| Important |
|---|---|
From version 5.2.3 Build 82 of the Routing Software, you can use the decimal and hexadecimal addressing in scripts together. If you use hexadecimal addresses in scripts, you always have to precede them with “0x”. You can use decimal and hexadecimal addresses in any combination, as long as each address clearly identifies an existing signal. | |
The following chart contains a few examples for mixed addressing:
| Routing command Format | Format Output Address | Format Input Address |
|---|---|---|
R0 1410, 17162; M OF> EXT 1 L -> S>EXT 2 L | decimal | decimal |
R0 1411, 17163; M OF> EXT 1 R -> S>EXT 2 R | decimal | decimal |
R0 0x0480, 1024; S VTR 1 L -> S>VTR 1 L | hex | decimal |
R0 0x0481, 1025; S VTR 1 R -> S>VTR 1 R | hex | decimal |
R0 1408, 0x430A; M OF> EXT 1 L -> S>EXT 1 L | decimal | hex |
R0 1409, 0x430B; M OF> EXT 1 R -> S>EXT 1 R | decimal | hex |
R0 0x0182, 0x4304; M OF> MAZ 2 L -> S>MAZ 2 L | hex | hex |
R0 0x0183, 0x4305; M OF> MAZ 2 R -> S>MAZ 2 R | hex | hex |
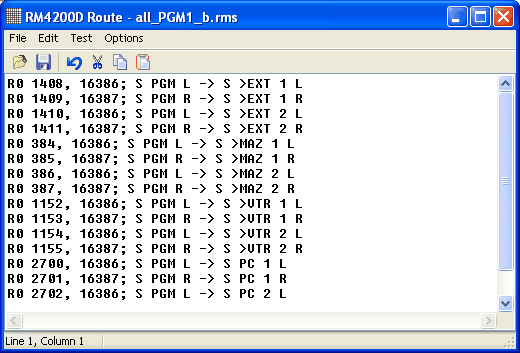
The following example contains all possibilities to manually enhance the functions of a routing script.
| Skriptcommand | Description |
|---|---|
ASKONCE | Single query at the start, if script should be executed. This command is not visible in the Script Editor. |
;RESET PFL | Comment line, prefaced by a semicolon. |
ASK: Reset PFL? | Individual query (ASK:); the string “Reset PFL” will be displayed in the dialogue. |
C11160000,0 | CAN bus command to reset all PFL routings. |
ASKEND | End of the individual query (ASKEND). |
RO 2690, 16384 | Routing commands |
RO 2691, 16385 | |
RO 896, 17152 | |
RO 897, 17153 | |
;PGM> Main Out | Comment line. |
RO 768, 24578 ; L | Routing commands; both, output address and source signal are formatted decimal, followed by a comment. |
RO 769, 24579 ; R | |
;PGM> ATM | Comment line. |
ASK: Main out to ATM? | Individual query(ASK:); the String “Main out to ATM?” will be displayed in the dialogue. |
RO 0x0880, 0x4300 | Routing commands; both, output address and source signal are formatted hexadecimal (audio source: output functions 1 and 2). |
RO 0x0881, 0x4301 | |
ASKEND | End of the individual query (ASKEND). |
;Main Out> Monitor | Comment line. |
C11000000,6,43,00,01,00,43,01 | CAN bus command to switch monitor bus to the main output signal (here: output functions 1 and 2). |