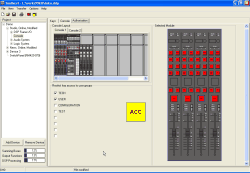
Use the tab Authorisation to restrict access to certain keys of the Console to authorised users only. Make sure you have set up user groups beforehand, otherwise this will not work. (see Authorisation)
Click on the tab Authorisation to select the keys you want to protect. You will see the modules of the Console in the miniature view. Keys already protected are shown in red, keys freely available are shown in grey. All users can use all grey keys without restriction and without entering a PIN number.
![[Important]](../pics/important.gif) | Important |
|---|---|
You can only restrict access to certain keys if you have set up user groups beforehand. Also, the keys you want to protect need to have a label. You assign these labels in the tab Console. If one of these two conditions is not met, you can not restrict the access to the key! | |
To restrict key access to certain user groups, do the following:
Click the desired module in the tab Console Layout. It will be shown at a larger scale in the area Selected Module to the right.
In this large view, click the key you want to restrict access to. If this key has been assigned a label and if user groups are set up properly, the area Restrict key access to user groups shows up bottom left in the dialog. The selected key and its label are displayed there in a larger view. To the left from it the list of all user groups is displayed, each list entry with a checkbox.
For each group that will have access to the key, click its checkbox. As soon as at least one checkbox is active, the key will be rendered red in the Console view.
Repeat steps 2 and 3 for all keys you want to restrict access to.
![[Important]](../pics/important.gif) | Important |
|---|---|
If you are using keys on the Console to activate the input mode for the PIN, make sure these keys are not assigned to a user group! If you restrict access to these keys, you create a deadlock situation where you can not enter a PIN on the Console! | |
